本文目录
概述
主要配置参数:
- 集群的Pacemaker的使用的是:SBD设备
- 本次配置涉及两台虚拟机,分别是:hana01,hana02。
- HANA负载均衡器的前端地址为:vhana01 (10.0.0.20),探针端口为:62501。
- SAP HANA System ID:HN1
- HANA Instance Number:01
注意:和官方文档保持一致,操作步骤前缀分别代表:
- [A] – 两台机器都需要执行
- [1] – 只需在结点1上执行
- [2] – 只需在结点2上执行
安装Pacemaker集群
基于SBD配置Pacemaker集群,我们已经在《Azure云上SAP-高可用NFS服务器配置》和《Azure云上SAP-高可用ASCS/ERS服务器配置 》两篇文章中演示过了,大同小异,所以此篇文章为了避免太多重复性内容,不再赘述。
当前Pacemaker集群配置完毕状态为:
hana01:~ # crm_mon -1
Stack: corosync
Current DC: hana02 (version 1.1.16-4.8-77ea74d) - partition with quorum
Last updated: Thu May 10 07:13:27 2018
Last change: Thu May 10 07:03:26 2018 by root via cibadmin on hana01

2 nodes configured
2 resources configured

Online: [ hana01 hana02 ]

Active resources:

 stonith-sbd    (stonith:external/sbd): Started hana01
 rsc_st_azure   (stonith:fence_azure_arm):      Started hana02
安装HANA数据库
[A] 设置磁盘布局
选择使用LVM模式进行磁盘布局。
查看所有可用的磁盘
hana01:~ # ls /dev/disk/azure/scsi1/lun*
/dev/disk/azure/scsi1/lun0 /dev/disk/azure/scsi1/lun2
/dev/disk/azure/scsi1/lun1 /dev/disk/azure/scsi1/lun3
为所有磁盘创建物理卷
hana01:~ # sudo pvcreate /dev/disk/azure/scsi1/lun0
 Physical volume "/dev/disk/azure/scsi1/lun0" successfully created
hana01:~ # sudo pvcreate /dev/disk/azure/scsi1/lun1
 Physical volume "/dev/sde" successfully created
hana01:~ # sudo pvcreate /dev/disk/azure/scsi1/lun2
 Physical volume "/dev/sdd" successfully created
hana01:~ # sudo pvcreate /dev/disk/azure/scsi1/lun3
 Physical volume "/dev/sdf" successfully created
创建数据,日志、共享文件所需的卷组
hana01:~ # sudo vgcreate vg_hana_data_HN1 /dev/disk/azure/scsi1/lun0 /dev/disk/azure/scsi1/lun1
 Volume group "vg_hana_data_HN1" successfully created
hana01:~ # sudo vgcreate vg_hana_log_HN1 /dev/disk/azure/scsi1/lun2
 Volume group "vg_hana_log_HN1" successfully created
hana01:~ # sudo vgcreate vg_hana_shared_HN1 /dev/disk/azure/scsi1/lun3
 Volume group "vg_hana_shared_HN1" successfully created
创建逻辑卷
hana01:~ # sudo lvcreate -l 100%FREE -n hana_data vg_hana_data_HN1
  Logical volume "hana_data" created.
hana01:~ # sudo lvcreate -l 100%FREE -n hana_log vg_hana_log_HN1
  Logical volume "hana_log" created.
hana01:~ # sudo lvcreate -l 100%FREE -n hana_shared vg_hana_shared_HN1
  Logical volume "hana_shared" created.
创建文件系统
hana01:~ # sudo mkfs.xfs /dev/vg_hana_data_HN1/hana_data
meta-data=/dev/vg_hana_data_HN1/hana_data isize=256    agcount=4, agsize=16776704 blks
         =                       sectsz=512   attr=2, projid32bit=1
         =                       crc=0        finobt=0, sparse=0
data     =                       bsize=4096   blocks=67106816, imaxpct=25
         =                       sunit=0      swidth=0 blks
naming   =version 2              bsize=4096   ascii-ci=0 ftype=1
log      =internal log           bsize=4096   blocks=32767, version=2
         =                       sectsz=512   sunit=0 blks, lazy-count=1
realtime =none                   extsz=4096   blocks=0, rtextents=0
hana01:~ # sudo mkfs.xfs /dev/vg_hana_log_HN1/hana_log
meta-data=/dev/vg_hana_log_HN1/hana_log isize=256    agcount=4, agsize=16776960 blks
         =                       sectsz=512   attr=2, projid32bit=1
         =                       crc=0        finobt=0, sparse=0
data     =                       bsize=4096   blocks=67107840, imaxpct=25
         =                       sunit=0      swidth=0 blks
naming   =version 2              bsize=4096   ascii-ci=0 ftype=1
log      =internal log           bsize=4096   blocks=32767, version=2
         =                       sectsz=512   sunit=0 blks, lazy-count=1
realtime =none                   extsz=4096   blocks=0, rtextents=0
hana01:~ # sudo mkfs.xfs /dev/vg_hana_shared_HN1/hana_shared
meta-data=/dev/vg_hana_shared_HN1/hana_shared isize=256    agcount=4, agsize=8388352 blks
         =                       sectsz=512   attr=2, projid32bit=1
         =                       crc=0        finobt=0, sparse=0
data     =                       bsize=4096   blocks=33553408, imaxpct=25
         =                       sunit=0      swidth=0 blks
naming   =version 2              bsize=4096   ascii-ci=0 ftype=1
log      =internal log           bsize=4096   blocks=16383, version=2
         =                       sectsz=512   sunit=0 blks, lazy-count=1
realtime =none                   extsz=4096   blocks=0, rtextents=0
创建挂载目录
hana01:~ # sudo mkdir -p /hana/data/HN1
hana01:~ # sudo mkdir -p /hana/log/HN1
hana01:~ # sudo mkdir -p /hana/shared/HN1
配置目录自动挂载
记录所有卷的UUID:
hana01:~ # sudo blkid | grep hana
/dev/mapper/vg_hana_data_HN1-hana_data: UUID="d23a2178-fc57-413a-a27f-5a389b230a57" TYPE="xfs"
/dev/mapper/vg_hana_log_HN1-hana_log: UUID="89d33537-be70-4f63-bc57-a4e77ff9147d" TYPE="xfs"
/dev/mapper/vg_hana_shared_HN1-hana_shared: UUID="6e5b6747-24e4-4ffe-8676-5b4ceff36af0" TYPE="xfs"
编辑fstab:
hana01:~ # vi /etc/fstab
写入以下内容:
/dev/disk/by-uuid/d23a2178-fc57-413a-a27f-5a389b230a57 /hana/data/HN1 xfs defaults,nofail 0 2
/dev/disk/by-uuid/89d33537-be70-4f63-bc57-a4e77ff9147d /hana/log/HN1 xfs defaults,nofail 0 2
/dev/disk/by-uuid/6e5b6747-24e4-4ffe-8676-5b4ceff36af0 /hana/shared/HN1 xfs defaults,nofail 0 2
自动挂载新卷:
hana01:~ # sudo mount -a
验证和确保目录挂载成功:
hana01:~ # mount | grep hana
/dev/mapper/vg_hana_data_HN1-hana_data on /hana/data/HN1 type xfs (rw,relatime,attr2,inode64,noquota)
/dev/mapper/vg_hana_log_HN1-hana_log on /hana/log/HN1 type xfs (rw,relatime,attr2,inode64,noquota)
/dev/mapper/vg_hana_shared_HN1-hana_shared on /hana/shared/HN1 type xfs (rw,relatime,attr2,inode64,noquota)
[A] 为所有主机设置主机名解析
略。本系统已配置域名解析服务器。
[A] 安装 HANA HA 包
hana01:~ # sudo zypper install SAPHanaSR
从HANA的DVD安装包中开始安装:
hana01:~ # /sapmedia/S4HANA/media/51052325/DATA_UNITS/HDB_SERVER_LINUX_X86_64/hdblcm -action=install

SAP HANA Lifecycle Management - SAP HANA Database 2.00.020.00.1500920972
************************************************************************
SAP HANA Database version '2.00.020.00.1500920972' will be installed.

Select additional components for installation:

  Index | Components | Description
  -------------------------------------------------------------------------------------------------
  1     | all        | All components
  2     | server     | No additional components
  3     | client     | Install SAP HANA Database Client version 2.2.23.1499440855
  4     | studio     | Install SAP HANA Studio version 2.3.27.000000
  5     | smartda    | Install SAP HANA Smart Data Access version 2.00.0.000.0
  6     | xs         | Install SAP HANA XS Advanced Runtime version 1.0.63.292045
  7     | afl        | Install SAP HANA AFL (incl.PAL,BFL,OFL,HIE) version 2.00.020.0000.1500932993
  8     | eml        | Install SAP HANA EML AFL version 2.00.020.0000.1500932993
  9     | epmmds     | Install SAP HANA EPM-MDS version 2.00.020.0000.1500932993

Enter comma-separated list of the selected indices [3]: 2
Enter Installation Path [/hana/shared]:[回车]
Enter Local Host Name [hana01]:[回车]
Do you want to add hosts to the system? (y/n) [n]:[回车]
Enter SAP HANA System ID: HN1
Enter Instance Number [00]: 01
Enter Local Host Worker Group [default]:[回车]

  Index | System Usage | Description
  -------------------------------------------------------------------------------
  1     | production   | System is used in a production environment
  2     | test         | System is used for testing, not production
  3     | development  | System is used for development, not production
  4     | custom       | System usage is neither production, test nor development

Select System Usage / Enter Index [4]: 1
Enter Location of Data Volumes [/hana/data/HN1]:[回车]
Enter Location of Log Volumes [/hana/log/HN1]:[回车]
Restrict maximum memory allocation? [n]:[回车]
Enter Certificate Host Name For Host 'hana01' [hana01]:[回车]
Enter SAP Host Agent User (sapadm) Password:********
Confirm SAP Host Agent User (sapadm) Password:********
Enter System Administrator (hn1adm) Password:********
Confirm System Administrator (hn1adm) Password:********
Enter System Administrator Home Directory [/usr/sap/HN1/home]:[回车]
Enter System Administrator Login Shell [/bin/sh]:[回车]
Enter System Administrator User ID [1001]:[回车]
Enter ID of User Group (sapsys) [79]:[回车]
Enter System Database User (SYSTEM) Password:********
Confirm System Database User (SYSTEM) Password:********
Restart system after machine reboot? [n]: n

Do you want to continue? (y/n): y

Installing components...
Installing SAP HANA Database...

SAP HANA Database System installed
You can send feedback to SAP with this form: https://hana01:1129/lmsl/HDBLCM/HN1/feedback/feedback.html
Log file written to '/var/tmp/hdb_HN1_hdblcm_install_2018-05-10_08.27.33/hdblcm.log' on host 'hana01'.
安装SAP 数据库实例
因为数据库实例,为高可用Application Server ABAP系统的独立组件,所以我也专门使用一篇文章演示。请参考《Azure云上SAP-数据库实例的安装》
配置HANA2.0系统复制
HANA2.0 引入了多租户概念,所以备份时要同时备份system db和tenant db,否则在配置replication会失败,一直提示没有备份。
[1]数据库备份
将hdbsql命令路径加入Path变量:
hana01:~ # PATH="$PATH:/usr/sap/HN1/HDB01/exe"
备份系统数据库
hana01:~ # hdbsql -d SYSTEMDB -u SYSTEM -p "Password" -i 01 "BACKUP DATA USING FILE ('initialbackup-system')"
0 rows affected (overall time 20.616643 sec; server time 20.614006 sec)
备份租户数据库
hana01:~ # hdbsql -d HN1 -u SYSTEM -p "Password" -i 01 "BACKUP DATA USING FILE ('initialbackup-HN1')"
0 rows affected (overall time 776.054363 sec; server time 776.051503 sec)
因为此时的hana租户数据库HN1已经包含了数据库实例创建的所有对象,并且是首次全备份,相对耗时(约12分钟左右),需要耐心等待。我们可以在hdbstudio中查看备份的进度:
[1]复制PKI文件
将hana01的PKI文件拷贝到hana02上:
hana01:~ # scp /usr/sap/HN1/SYS/global/security/rsecssfs/data/SSFS_HN1.DAT hana02:/usr/sap/HN1/SYS/global/security/rsecssfs/data/
SSFS_HN1.DAT 100% 2960 2.9KB/s 00:00
hana01:~ # scp /usr/sap/HN1/SYS/global/security/rsecssfs/key/SSFS_HN1.KEY hana02:/usr/sap/HN1/SYS/global/security/rsecssfs/key/
SSFS_HN1.KEY 100% 187 0.2KB/s 00:00
[1]配置默认结点
将hana01配置为默认结点:
hana01:~ # su - hn1adm
hn1adm@hana01:/usr/sap/HN1/HDB01> hdbnsutil -sr_enable -name=SITE1
checking for active nameserver ...
nameserver is active, proceeding ...
successfully enabled system as system replication source site
done.
[2]配置复制结点
将hana02配置为从hana01上进行复制:
hana02:~ # su - hn1adm
hn1adm@hana02:/usr/sap/HN1/HDB01> sapcontrol -nr 01 -function StopWait 600 10

11.05.2018 08:18:27
Stop
OK

11.05.2018 08:18:47
StopWait
OK
hn1adm@hana02:/usr/sap/HN1/HDB01> hdbnsutil -sr_register --remoteHost=hana01 --remoteInstance=01 --replicationMode=sync --name=SITE2
adding site ...
--operationMode not set; using default from global.ini/[system_replication]/operation_mode: logreplay
checking for inactive nameserver ...
nameserver hana02:30101 not responding.
collecting information ...
updating local ini files ...
done.
hn1adm@hana02:/usr/sap/HN1/HDB01> exit
logout
创建SAP HANA 集群资源
集群资源的创建可以在Pacemaker中的任意结点进行创建,这里我们选择hana01。
[1]创建Hana 拓扑
注意SID=HN1,InstanceNumber=01
sudo crm configure property maintenance-mode=true
 sudo crm configure primitive rsc_SAPHanaTopology_HN1_HDB01 ocf:suse:SAPHanaTopology \
 operations \$id="rsc_sap2_HN1_HDB01-operations" \
 op monitor interval="10" timeout="600" \
 op start interval="0" timeout="600" \
 op stop interval="0" timeout="300" \
 params SID="HN1" InstanceNumber="01"
 sudo crm configure clone cln_SAPHanaTopology_HN1_HDB01 rsc_SAPHanaTopology_HN1_HDB01 \
 meta is-managed="true" clone-node-max="1" target-role="Started" interleave="true"
[1]创建HANA资源
同样需要注意SID=HN1,InstanceNumber=01,负载均衡前端IP=10.0.0.20,探针端口号=62501
sudo crm configure primitive rsc_SAPHana_HN1_HDB01 ocf:suse:SAPHana \
     operations \$id="rsc_sap_HN1_HDB01-operations" \
     op start interval="0" timeout="3600" \
     op stop interval="0" timeout="3600" \
     op promote interval="0" timeout="3600" \
     op monitor interval="60" role="Master" timeout="700" \
     op monitor interval="61" role="Slave" timeout="700" \
     params SID="HN1" InstanceNumber="01" PREFER_SITE_TAKEOVER="true" \
     DUPLICATE_PRIMARY_TIMEOUT="7200" AUTOMATED_REGISTER="false"
sudo crm configure ms msl_SAPHana_HN1_HDB01 rsc_SAPHana_HN1_HDB01 \
     meta is-managed="true" notify="true" clone-max="2" clone-node-max="1" \
     target-role="Started" interleave="true"
sudo crm configure primitive rsc_ip_HN1_HDB01 ocf:heartbeat:IPaddr2 \
     meta target-role="Started" is-managed="true" \
     operations \$id="rsc_ip_HN1_HDB01-operations" \
     op monitor interval="10s" timeout="20s" \
     params ip="10.0.0.20"
sudo crm configure primitive rsc_nc_HN1_HDB01 anything \
     params binfile="/usr/bin/nc" cmdline_options="-l -k 62501" \
     op monitor timeout=20s interval=10 depth=0
sudo crm configure group g_ip_HN1_HDB01 rsc_ip_HN1_HDB01 rsc_nc_HN1_HDB01
sudo crm configure colocation col_saphana_ip_HN1_HDB01 4000: g_ip_HN1_HDB01:Started \
     msl_SAPHana_HN1_HDB01:Master
sudo crm configure order ord_SAPHana_HN1_HDB01 2000: cln_SAPHanaTopology_HN1_HDB01 \
     msl_SAPHana_HN1_HDB01
在机器创建的过程中,可能会产生失败的中间状态,这里做一次状态清理。
sudo crm resource cleanup rsc_SAPHana_HN1_HDB01
关闭机器维护模式
sudo crm configure property maintenance-mode=false
[1]查看集群状态
可以用命令:
hana01:~ # sudo crm_mon -r -1
Stack: corosync
Current DC: hana02 (version 1.1.16-4.8-77ea74d) - partition with quorum
Last updated: Mon May 14 02:21:11 2018
Last change: Mon May 14 02:20:50 2018 by root via crm_attribute on hana01

2 nodes configured
8 resources configured

Online: [ hana01 hana02 ]

Full list of resources:

 stonith-sbd    (stonith:external/sbd): Started hana01
 rsc_st_azure   (stonith:fence_azure_arm):      Started hana02
 Clone Set: cln_SAPHanaTopology_HN1_HDB01 [rsc_SAPHanaTopology_HN1_HDB01]
     Started: [ hana01 hana02 ]
 Master/Slave Set: msl_SAPHana_HN1_HDB01 [rsc_SAPHana_HN1_HDB01]
     Masters: [ hana01 ]
     Slaves: [ hana02 ]
 Resource Group: g_ip_HN1_HDB01
     rsc_ip_HN1_HDB01   (ocf::heartbeat:IPaddr2):       Started hana01
     rsc_nc_HN1_HDB01   (ocf::heartbeat:anything):      Started hana01
我更喜欢SESE Hawk
场景测试
虚拟IP连通性测试
虽然在前面的步骤中集群中的所有资源状态良好,但是如果我们能够在jump01上的SAP HANA Studio客户端,通过vhana01 (负载均衡前端IP)登陆进HANA系统中,才真正算集群的初始状态是正常工作的。
先确保vhana01 的确解析到HANA负载均衡前端IP(10.0.0.20),可以在PowerShell控制台进行检测
PS C:\> Resolve-DnsName vhana01

Name                                           Type   TTL   Section    IPAddress
----                                           ----   ---   -------    ---------
vhana01.azure-sap.poc                          A      86400 Answer     10.0.0.20
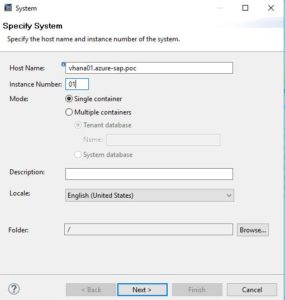
打开SAP HANA Studio -> Add System:
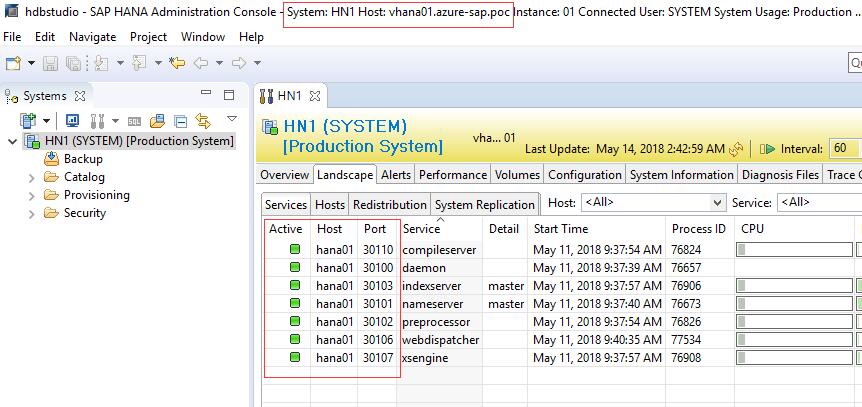
从上图中,我们可以看到HANA studio 已经通过负载均衡IP连接到了hana01,符合预期。
Fencing 测试
首先在jump01上安装hdbclient,默认安装目录为:C:\Program Files\sap\hdbclient\
打开PowerShell控制台,执行下面的脚本。该脚本会每200毫秒检测HANA的数据库连接可用性,并记录在控制台:
$lastState = $false
do
{
 & 'C:\Program Files\sap\hdbclient\hdbsql.exe'  -n vhana01 -u system -p PASSWORD -i 01 'SELECT CURRENT_DATE FROM DUMMY;' | Out-Null
 $state = $?
 if($state -ne $lastState){
    '{0}->{1} on {2:o}' -f $lastState,$state,(Get-Date)
    $lastState = $state
 }
 sleep -Milliseconds 200
}
while($true)
然后在hana01上禁用网卡,期望集群中的资源迁移到hana02上。
hana01:~ # sudo ifdown eth0
下面是PowerShell控制台上面的部分输出:
* -10709: Connection failed (RTE:[89006] System call 'connect' failed, rc=10060:A connection attempt failed because the
connected party did not properly respond after a period of time, or established connection failed because connected host
 has failed to respond (vhana01:30115))
True->False on 2018-05-15T08:21:58.9969611+00:00
******
False->True on 2018-05-15T08:23:09.1574725+00:00
故障转移时间71秒,1分钟多一点,非常可观。
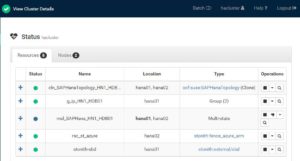
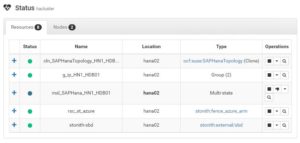
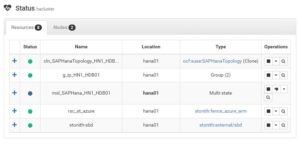
查看集群的状态:
然后手动重启机器hana01,因为之前在配置集群资源时把AUTOMATED_REGISTER的值设置为false,此时需要手动注册hana01从hana02上进行复制:
关闭服务
hana01:~ # su - hn1adm
hn1adm@hana01:/usr/sap/HN1/HDB01> sapcontrol -nr 01 -function StopWait 600 10

15.05.2018 11:02:36
Stop
OK

15.05.2018 11:02:36
StopWait
OK
配置复制:
hn1adm@hana01:/usr/sap/HN1/HDB01> hdbnsutil -sr_register --remoteHost=hana02 --remoteInstance=01 --replicationMode=sync --name=SITE1
adding site ...
--operationMode not set; using default from global.ini/[system_replication]/operation_mode: logreplay
checking for inactive nameserver ...
nameserver hana01:30101 not responding.
collecting information ...
updating local ini files ...
done.
hn1adm@hana01:/usr/sap/HN1/HDB01> exit
logout
清理错误状态:
hana01:~ # crm resource cleanup msl_SAPHana_HN1_HDB01 hana01
Cleaned up rsc_SAPHana_HN1_HDB01:0 on hana01
Waiting for 1 replies from the CRMd. OK
配置结束以后,hana02变成了默认节点,我们可以在它上面查看复制状态:
hana02:~ #  su - hn1adm
hn1adm@hana02:/usr/sap/HN1/HDB01>  python exe/python_support/systemReplicationStatus.py
| Database | Host   | Port  | Service Name | Volume ID | Site ID | Site Name | Secondary | Secondary | Secondary | Secondary | Secondary     | Replication | Replication  | Replication                         |
|          |        |       |              |           |         |           | Host      | Port      | Site ID   | Site Name | Active Status | Mode        | Status       | Status Details                      |
| -------- | ------ | ----- | ------------ | --------- | ------- | --------- | --------- | --------- | --------- | --------- | ------------- | ----------- | ------------ | ----------------------------------- |
| SYSTEMDB | hana02 | 30101 | nameserver   |         1 |       2 | SITE2     | hana01    |     30101 |         1 | SITE1     | YES           | SYNC        | ACTIVE       |                                     |
| HN1      | hana02 | 30107 | xsengine     |         2 |       2 | SITE2     | hana01    |     30107 |         1 | SITE1     | YES           | SYNC        | ACTIVE       |                                     |
| HN1      | hana02 | 30103 | indexserver  |         3 |       2 | SITE2     | hana01    |     30103 |         1 | SITE1     | YES           | SYNC        | INITIALIZING | Full Replica: 66 % (30656/46256 MB) |

status system replication site "1": INITIALIZING
overall system replication status: INITIALIZING
测试手动故障转移
执行了上面的测试以后,默认节点已经在hana02上,假如我现在要给hana02打补丁了,我想把资源重新切回hana01上。可以直接关闭hana02上的pacemaker。
hana02:~ # service pacemaker stop
关闭的过程稍微长一点,因为集群需要响应等待所有资源已经运行在其他活动结点上:
关闭后查看集群的状态:
同样,重启hana2上的pacemaker后,也需要把hana02配置从hana01进行复制:
hana02:~ # service pacemaker start
hana02:~ # su - hn1adm
hn1adm@hana02:/usr/sap/HN1/HDB01> sapcontrol -nr 01 -function StopWait 600 10

15.05.2018 11:35:14
Stop
OK

15.05.2018 11:35:14
StopWait
OK
hn1adm@hana02:/usr/sap/HN1/HDB01> hdbnsutil -sr_register --remoteHost=hana01 --remoteInstance=01 --replicationMode=sync --name=SITE2
adding site ...
--operationMode not set; using default from global.ini/[system_replication]/operation_mode: logreplay
checking for inactive nameserver ...
nameserver hana02:30101 not responding.
collecting information ...
updating local ini files ...
done.
hn1adm@hana02:/usr/sap/HN1/HDB01> exit
logout
hana02:~ # crm resource cleanup msl_SAPHana_HN1_HDB01 hana02
Cleaned up rsc_SAPHana_HN1_HDB01:0 on hana02
Waiting for 1 replies from the CRMd. OK
测试迁移
当前hana集群的资源运行在hana01上,并且hana01是主结点:
hana01:~ # crm_mon -r -1
Stack: corosync
Current DC: hana01 (version 1.1.16-4.8-77ea74d) - partition with quorum
Last updated: Tue May 15 15:26:24 2018
Last change: Tue May 15 15:25:54 2018 by root via crm_attribute on hana01

2 nodes configured
8 resources configured

Online: [ hana01 hana02 ]

Full list of resources:

stonith-sbd    (stonith:external/sbd): Started hana01
rsc_st_azure   (stonith:fence_azure_arm):      Started hana01
Clone Set: cln_SAPHanaTopology_HN1_HDB01 [rsc_SAPHanaTopology_HN1_HDB01]
     Started: [ hana01 hana02 ]
Master/Slave Set: msl_SAPHana_HN1_HDB01 [rsc_SAPHana_HN1_HDB01]
     Masters: [ hana01 ]
     Slaves: [ hana02 ]
Resource Group: g_ip_HN1_HDB01
     rsc_ip_HN1_HDB01   (ocf::heartbeat:IPaddr2):       Started hana01
     rsc_nc_HN1_HDB01   (ocf::heartbeat:anything):      Started hana01
我想手动把hana01主节点从hana01迁移到hana02。
hana02:~ # crm resource migrate msl_SAPHana_HN1_HDB01 hana02
INFO: Move constraint created for msl_SAPHana_HN1_HDB01 to hana02
hana02:~ # crm resource migrate g_ip_HN1_HDB01 hana02
Error performing operation: g_ip_HN1_HDB01 is already active on hana02
Error performing operation: Invalid argument
为了让迁移快速生效,在hana01上注册,hana01从hana02进行复制:
hana01:~ # su - hn1adm
hn1adm@hana01:/usr/sap/HN1/HDB01> sapcontrol -nr 01 -function StopWait 600 10

15.05.2018 15:31:53
Stop
OK

15.05.2018 15:31:53
StopWait
OK
hn1adm@hana01:/usr/sap/HN1/HDB01>  hdbnsutil -sr_register --remoteHost=hana02 --remoteInstance=01 --replicationMode=sync --name=SITE1
adding site ...
--operationMode not set; using default from global.ini/[system_replication]/operation_mode: logreplay
checking for inactive nameserver ...
nameserver hana01:30101 not responding.
collecting information ...
updating local ini files ...
done.
hn1adm@hana01:/usr/sap/HN1/HDB01>  exit
logout
hana01:~ #
在hana02上编辑机器资源,删除因为迁移产生的约束constraints ,前缀为cli-prefer-msl_SAPHana_HN1
hana02:~ # crm configure edit
# remove target line prefix is [cli-prefer-msl_SAPHana_HN1]
然后清楚hana01上可能产生的错误状态:
hana01:~ # crm resource cleanup msl_SAPHana_HN1_HDB01 hana01
Cleaned up rsc_SAPHana_HN1_HDB01:0 on hana01
Waiting for 1 replies from the CRMd. OK
现在查看整个集群的状态,hana02已经变成了主节点。
hana01:~ # crm_mon -r -1
Stack: corosync
Current DC: hana01 (version 1.1.16-4.8-77ea74d) - partition with quorum
Last updated: Tue May 15 15:43:59 2018
Last change: Tue May 15 15:43:16 2018 by root via crm_attribute on hana01

2 nodes configured
8 resources configured

Online: [ hana01 hana02 ]

Full list of resources:

stonith-sbd    (stonith:external/sbd): Started hana01
rsc_st_azure   (stonith:fence_azure_arm):      Started hana01
Clone Set: cln_SAPHanaTopology_HN1_HDB01 [rsc_SAPHanaTopology_HN1_HDB01]
     Started: [ hana01 hana02 ]
Master/Slave Set: msl_SAPHana_HN1_HDB01 [rsc_SAPHana_HN1_HDB01]
     Masters: [ hana02 ]
     Slaves: [ hana01 ]
Resource Group: g_ip_HN1_HDB01
     rsc_ip_HN1_HDB01   (ocf::heartbeat:IPaddr2):       Started hana02
     rsc_nc_HN1_HDB01   (ocf::heartbeat:anything):      Started hana02
至此,基本场景测试已完成。
引用通告
《Azure 虚拟机 (VM) 上的 SAP HANA 高可用性》
请尊重原作者和编辑的辛勤劳动,欢迎转载,并注明出处!

